How to Poach An Egg - Your Guide to the Many Approaches to Poaching
Poached eggs are really having a moment. Sure, we egg folk have long been touting the tastiness of a runny yolk encased in perfectly sumptuous whites. While fried eggs rule the breakfast scene, and boiled eggs the lunchtime rush, poached eggs bring an impressive flair to the otherwise humble egg — a breakfast protein celebrated for its affordability, versatility and general ease of use.
However, the poached egg is a mystery to a lot of people. Many are put off by its perceived difficulty level — the stirring, the cutting, the molds, the question of whether vinegar is a nice-to-have or a must-have.
That said, poaching eggs isn’t necessarily as hard as one might believe. With a few rules under your belt and a couple of tricks up your sleeve, poached eggs will no longer be a dish you have to pay someone else to make.
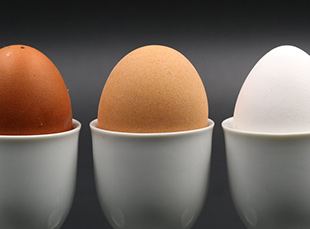
There are so many ways to cook eggs. From hard-boiled and soft-boiled to scrambled, deviled and over-easy, eggs are just about one of the most versatile foods you can get.
And poached eggs with their gooey insides and tender outer whites are something to behold. A seemingly complicated take on a relatively simple food. So what, exactly does poaching entail?
Is poaching the same as making a soft-boiled egg? Well, not exactly. A soft-boiled egg, though it's also cooked in water and features a runny yolk, is cooked entirely within the shell. Poached eggs are boiled in water — sans shell the entire time. Well, except for the great Julia Child's recipe, but we'll get to that later.
Poached eggs are typically cracked into barely simmering water — in a pot, pan or poacher — and swirled gently until cooked. Eggs cook for two to four minutes depending on your preference and are ready to be featured in any manner of salads, toasts and more.
Here are several methods for making poached eggs — more than you'll ever need.
How to Poach the Perfect Egg
If you’re not a total egg pro, just set a timer. It’s hard to tell whether an egg is poached to the desired doneness until you’ve poached a ton of eggs. At that point — hey, you’ll just know.
Beginners, listen up: For a runny yolk, cook for about two minutes. For a medium yolk, three minutes, and well-done — throw them in for about four minutes apiece.
When your eggs are cooked, you’re out of the woods — for the most part. Because the eggs cook in water, you’ll have to make sure things dry out before serving. Little reserves of water build up in parts of the eggs, and serving them as is will lead diners to believe they’re getting a poor example of the dish. Waterlogged eggs with a runny yolk — a little icky, right?
Good thing it’s an easy fix. Gently take those eggs out of whatever vessel they cooked in using a slotted spoon. Place your eggs on top of a clean kitchen towel or its paper equivalent. If you do use a paper towel, use the good stuff. The flimsier brands tend to stick to the eggs, and you don't want to be eating bits of paper along with all your hard work.
Pat the tops of those eggs dry with a separate cloth or paper towel. And voila, you're ready to serve those babies up.
A Note About Swirling
Keep reading, and you'll quickly see that some poaching techniques ask you to swirl the water. Be really intentional about this. Once your water hits that desired simmering temp, you'll want to swirl your eggs with a long spoon. This gives you the whirlpool effect you’ll hear about a few times below.
But you should only stir the water before the eggs hit the pan, not during. Attempting to keep the whirlpool going while the eggs are already in play isn't bound to work out. The idea of this method is to keep the egg whites tucked around the yolk, creating a perfectly oblong egg with no scraggly white wisps in sight.
Remember: It's a quick flick of the wrist, and that's it.
Be Gentle When Placing Eggs in the Poaching Liquid
The poaching pan is no place for aggression. If you haven't noticed how many times we've dropped the word "gentle" into the mix, now is the time we'll be a bit blunter.
When placing your eggs into the poaching liquid, you'll want to ease it in there. Don't just plop and go. Your best bet for a soft send-off is to crack each egg into an individual container beforehand. This could be a small mug, a measuring cup, a ramekin or anything else you've got on hand. Lower the container into the water slowly and tenderly pour the egg into the liquid.
The Temperature Needs to Be Perfect
With boiled eggs, this is no big deal. You plop them in cold water, and the timing is pretty flexible. But poached eggs — well, these little guys are temperamental, to be sure.
If the water is on the colder side, cracking eggs into the pan will result in a major separation, the whites spread all over the place and essentially making one big, soggy, barely cooked mess.
On the other end of the spectrum, you'll find that boiling the water — except in the case of silicon poaching cups — leads to violently boiling egg whites. Again, something you'd like to avoid.
A simmer is what you’re going for. It’s that point where the water is hot, on the verge of boiling, but you’re just getting those teensy bubbles on the base of the pan.
What's the Deal with Vinegar?
The vinegar method is a tip many egg pros swear by. But it’s not for everyone. This technique involves adding a few drops of regular, white vinegar to the poaching pot. We've noticed most poaching methods call for vinegar, but it's not a requirement. There are ways to poach eggs without using vinegar. We'll outline a few alternatives for keeping whites intact without any extra ingredients.
This extra ingredient helps keep the whites from floating away — you’ll get a prettier egg with none of those pesky strings you have to cut off. On the flip side, the vinegar leaves its stamp on the eggs.
So, if you don’t love the taste of vinegar, it’s better to suck it up and poach without any assistance.
Fresh Eggs Are Always Better
Look, if you’re going to do eggs, we recommend using the freshest eggs you can find — it just leads to a better flavor, texture and so on. If you’re looking to use up two dozen eggs that have slid past their expiration date, that’s just fine, but we’d suggest boiling them or making a scramble instead. These methods are far more forgiving than poaching.
So, why does the egg need to be as fresh as possible? Well, the fresher the egg, the richer the yolk and the better the egg stays together. Peak freshness not only makes the process a whole lot easier, but it also ensures the eggs taste better.
Of course, all this talk about freshness begs the question: How long will an egg keep? The short answer is eggs last for a really long time. They're protected in that shell, and if you keep them in the fridge, they'll keep for about four to five weeks beyond the pack date. And as far as food safety is concerned, if an egg slips past the use-by date, it’s generally no big deal.
But poached eggs are a sensitive beast. You’ll want to pay attention in this area, as you’re not relying on the power of butter to make these taste better. Eggs must be chilled as soon as possible after you make a purchase.
Speaking of which, how do you identify a high-quality egg? Well, buying organic is a good start, and of course, checking for cracks or imperfections. Additionally, if you're poaching, best results will come from eggs closest to the pack date.
Different Methods for Poaching an Egg
Everyone has an idea of what the best approach to egg poaching looks like. But there are few different methods you can add to your egg-making repertoire.
There’s Julia Child’s par-boiled approach, there are poaching pans and there’s the microwave. There are sleeves and sieves, and the whirlpool method. And you know what? All lead to the same beautiful yolky goodness — you know, if they don’t explode or separate in the process.
The Classic Poaching Mode
There's always one right way to do something. Or, instead, there's always one prevailing wisdom that makes the most rounds through the web. The method below promises to make you the perfect poached egg. Give it a try, and if it works for you, awesome. If your poached eggs leave a lot to be desired, take heart. There are countless ways to poach an egg.
But, we promise this one isn't all that hard. See for yourself.
Take out a two-quart saucepan. Add about an inch of water, plus two teaspoons of vinegar and a teaspoon of sea salt. Bring that small amount of water to a simmer.
As the water heats, crack an egg into a small container like a ramekin or a measuring cup. Grab a spoon or spatula and quickly stir the hot water in one direction — like a whirlpool, until you can see it spinning around.
Add the egg, very carefully, into the eye of the whirlpool. This motion helps keep the egg white from spreading out in the pan, creating those wispy tails that, quite frankly, leave a poached egg looking a little rough around the edges.
The whirlpool tends to work best if you're only making a single egg at one time. Otherwise, the multiple moving parts may collide, resulting in a batch of eggs sure to disappoint.
If you're making a bigger batch — and honestly, why just make one poached egg? — you'll instead heat the salt and vinegar with the water in a large, non-stick skillet. And no, you're not going to stir.
In any case — one egg or six — you'll want to let them poach. Cover the pan and cook for around four minutes. And during that time, do not lift the lid, poke your eggs or otherwise engage with them. When the timer goes off, remove the egg from the heat using a slotted spoon and serve.
If you'd like to save some eggs for later, move your eggs to an ice bath and place them in the fridge. They'll only keep for about eight hours, so try to eat them within the same day.
The Par-Boiled — aka the Julia Child — Method
Julia Child has a slightly different approach to poached eggs. She starts off by boiling the eggs just a bit, and from there, she starts poaching. This method aims to address those stringy egg whites that have long plagued poachers of all levels.
If you're a beginner, you've probably noticed those whites getting wispy. It's not a deal breaker. The egg remains edible, but it does make for a sloppy presentation and more room for water to get into the various nooks and crannies that just wouldn't exist with a tighter egg.
So, back to Julia's method. The idea is to eliminate that scraggly white stream trailing behind your egg. You'll need a few things to get going: a pin and a timer, as well as a slotted spoon, a pot and a few eggs.
Your first step? Fill the pot with water and bring it to a boil.
Now, the pin enters the equation. Make a small hole in the eggshell using the pin. The hole needs to be small enough that the egg boils without expelling any precious fluid. The purpose of the hole is to release any air that exists inside the egg that may cause it to crack.
Add eggs — shell and all — and boil for specifically 10 seconds and remove from heat. The purpose of boiling is to help the egg retain its shape after it's cracked into the simmering water. The short amount of time it spends boiling allows it the whole egg to stick together in the face of losing its shell.
Reduce the heat, bringing the once-boiling water down to a simmer. Then, poach as usual. Crack the egg carefully into the simmering pan, cooking for just a few minutes.
What's great about this method is after you've boiled the eggs for the 10 seconds, you can then poach however you like. You don't need any specialized equipment, and the boiling makes that even more valid than before, but you're still welcome to use whatever egg cups, rings, pans that work for you.
The Frying Pan Method — How to Poach an Egg Without Vinegar
This option is another good choice for poachers without any equipment on hand. All you need are the eggs and a frying pan. You'll want to add just a few centimeters of water to the pan, turning the burner to medium.
The heat should be low enough that you'll get a few simmering bubbles on the bottom of the pan, but no roaring boil. Just those wimpy, tiny bubbles.
Then gently break your egg into the water. You can do this directly if you're feeling confident, or you can crack the egg into a cup and transfer to the poaching liquid. Cook for about three minutes, with no stirring, prodding or even covering. Remove from heat with a slotted spoon and pat dry with a clean towel.
One issue with the frying pan method is it's not the prettiest poached egg. If the presentation is the name of the game, we'd suggest going with a poaching pan or rings instead. These eggs look a bit like a fried egg and feature a more visible yolk than you'll see in some of the other methods.
How to Easily Poach an Egg Using a Silicon Egg Cup
We've found that many people have a bit of trouble getting the silicon egg cups to work. These are soft cups that look like a silicon square folded into an upright position. They are designed to gently hold the eggs as they poach, reducing the amount of poaching liquid that actually enters the egg.
Unlike the classic poaching method and Julia Child's boiled-then-poached approach, using the silicon requires that the water boils throughout the cooking process. Silicon doesn't transfer much heat to the eggs — they actually poach because the surrounding hot water steams the eggs.
So, your first step is to fill a pot with water and bring it to a boil. Add a small amount of butter or oil to the insides of the silicon cups for easy removal, then place each cup into the pot.
Crack eggs in a separate container, one egg at a time, then gently transfer to the sleeves. Cover the pot and let the eggs cook for about six minutes.
Remove from heat. It's a little tricky to pull the cups out of the boiling water. It seems that using a ladle works pretty well, but you'll want to proceed with caution here.
Poaching Eggs in the Microwave
Yes, you really can poach eggs in a microwave. Is it the best way? Well, it’s pretty debatable. But you do get a runny yolk you can apply to any salad or sandwich and still not be late for work. Modern marvels, right?
But poaching an egg in the microwave comes with its own set of rules. Fortunately, they are pretty easy to follow. Home cooks and pros alike swear by the micro-poaching method. It’s foolproof, they say — great for a quick bite, a lunch egg.
All in all, cooking a poached egg in the microwave is a pretty quick and easy thing to do. For one, it only takes about thirty seconds, but if you’re not careful, you may find that your egg explodes or quickly turns to rubber. Here is a method you can live by.
First break your egg into a ramekin, then cover with a small dish or a bit of plastic wrap. Place in the microwave for 30 seconds and let stand.
If the white hasn’t fully set, you’ll want to try cooking the egg for another 10 seconds. That’s it. The challenge is, you don’t want to overcook the egg, so first-timers, try cooking at intervals. Start off at 25 seconds and build, just until the white has set — adding five or 10 seconds at a time.
The method we outlined above does not require water, just an egg and a small covered dish. But some cooks prefer to add a touch of water to their poaching game.
Here’s how you can try this alternative way yourself: Put a small amount of water into a mug or a ramekin. In a separate container, break the egg, then gently transfer to the bowl holding the water. Microwave on high for about 30 seconds. Remove from ramekin, then add your salt and pepper.
Again, all microwaves were not created equal, and it may take some experimentation to figure out the best time for cooking your eggs.
Using a Poaching Pan
If you love poached eggs made easy, you may want to invest in a poaching pan. While you probably are aware of the general disdain for the single-use tools of the kitchen, the poaching pan is the rare exception that comes in handy on a regular basis — perfect for egg lovers of all stripes.
Poaching pans come in a range of sizes, from a two- or three-egg operation to larger six-egg configurations. They are a great way to make multiple eggs at once without crowding the pan.
How do you make poached eggs in a dedicated poached egg pan?
Here goes:
Fill your egg-poaching pan with about a half inch of water. Turn the burner to medium-high heat and bring to a simmer, not a boil. Next, you'll want to add a small amount of oil to the egg cups and heat them up. These are removable, so add them after the water hits that desired simmer.
Crack each egg into the into each cup, cover and cook for two to four minutes. Remove from the pan and serve as desired.
Poaching With Metal Egg Rings
Metal poaching rings kind of like the poaching pan deconstructed. Add these little guys to a pan, and you've got a poacher — without having to sacrifice major real estate in your kitchen cabinets.
Poach your eggs by first adding your rings to the frying pan, then fill with water. You'll want the rings to be fully submerged, with the water rising about a centimeter above where the ring stops. It's best if both the pan and the rings are non-stick — this will keep things from getting too messy.
Turn the burner to medium-high and bring the liquid to a near simmer. Then, place a cracked egg into each ring. Cook for between two and four minutes and remove when done. Use tongs and be sure to remove any excess liquid.
One thing to note: If you’re using a pan and it should become too hot, bubbles can form under the egg, which causes the bottom part to cook faster than the top. If you are concerned the egg isn't cooking evenly, reduce the heat a bit and gently move the water around with your spatula.
Try Using Saran Wrap
A good method for those of you who’d like to test out a “special tool” for poaching eggs but would rather avoid putting going out and purchasing a whole set silicon cups or rings, or you know, a whole pan. Make your own with plastic wrap! Here’s how:
Cut a piece of saran wrap about nine inches and place the wrap over the top of a mug. Push the plastic into the mug, forming to the shape of the inside of the vessel. Then, take your egg and gently crack it into the plastic lined mug.
Then, seal the deal by twisting the saran wrap together at the top. Next, grab a saucepan and bring water to a boil. Gently place your wrapped eggs into the pan and cook on medium heat for about four to five minutes. Leave the burner on medium-high heat for best results.
Remove the eggs from the pan and unwrap. You should have perfect eggs, ready to serve.
Poaching Myths
As you can see, there are plenty of ways to poach an egg. How you do it is really up to you or what you've got on hand in the kitchen.
Again, you'll know you've done it correctly if the egg looks like a smooth and delicate bubble or pouch. The egg should have a soft but firm outer white. It should also have a runny, fluid center — a volcano of rich yellow molten yolk. You see, the perfect poached egg is all about contrast.
So, while there are many ways to perfect this play on textures, the poaching process is rife with roadblocks. To put it simply, there are a ton of myths out there that perpetuate lousy egg-making or worse, no egg-making at all.
While the conventional wisdom about poached eggs will never truly be uniform, there are a few things you shouldn't worry about. Here are a few of the persisting myths surrounding poached eggs that you can just forget about.
1. You'll Need Various Contraptions Just to Make Breakfast
As we outlined above, silicon egg cups and poaching pans do work pretty reliably, but they're not necessary for breakfast success. But many people who are considering poaching eggs themselves may be unsure about whether buying extra accouterment is the only way they can make eggs worth photographing.
It's official. Single-use gadgets are, by and large, a waste of money. Something to purchase for a white elephant game or a gift for someone whose tastes you're not sure about. For those folks who love a useful gadget, these items do work as intended, but much of the preparation process is the same as you'll get if you opt to crack those eggs gently and place them in that slightly boiling water.
Try poaching your eggs without a poacher, and if you can't do it — we believe in you, by the way — invest in the poacher. The fixed-frame poaching pans seem to be foolproof.
2. Vinegar Is a Major Must
We've said it already, but it's worth repeating. Using vinegar to keep your egg whites from trailing off is wholly unnecessary. It may be worth it to some, but the process makes your eggs taste a bit like vinegar, which isn't exactly a subtle flavor.
On top of the taste factor, boiling vinegar water fills your kitchen with the smell of vinegar. So, rather than filling your home with the warm scent of what's on the table, you'll instantly be reminded of all those times you dyed Easter eggs as a child.
That said, some people swear by this method, smell and all, and believe those extra drops make all the difference.
3. You Definitely Need to Swirl Water Before Poaching the Eggs
Don't do this — while the classic poaching method relies on eggs being gently swirled, swirling the water is going to agitate the proteins inside the egg. The gentler the environment, the better. A whirlpool — well, that'll just make things fall apart pretty darn fast.
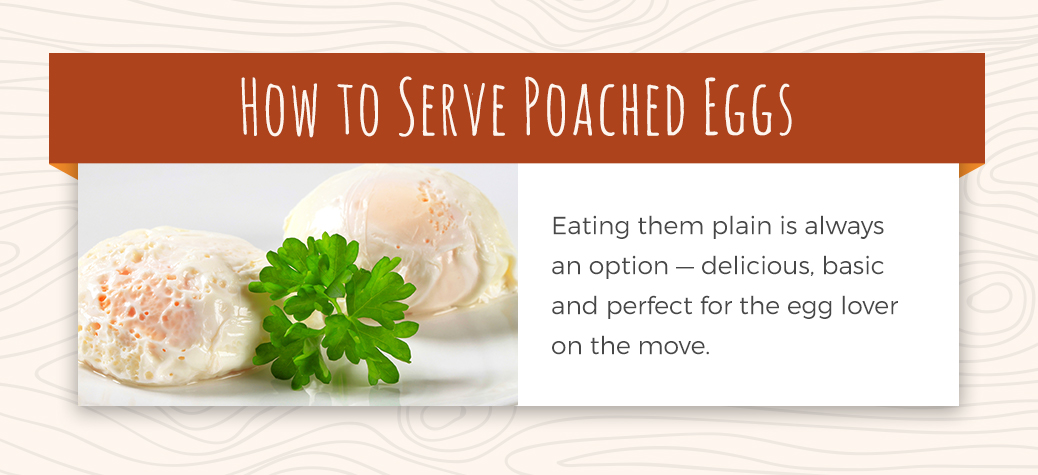
How to Serve Poached Eggs
Now that you've got some poached egg knowledge under your belt, you may be wondering: What do I do with these eggs?
Eating them plain is always an option — delicious, basic and perfect for the egg lover on the move. But if you'd like to slow down and celebrate your ability to take on a new egg-related challenge, we've got a few ideas for dressing up the perfect poached egg. Well, they don't have to be perfect.
Poach in Some Extras
Feeling a little fancy? Embrace it and add some additional flavor to your egg. The best way to do this is to crack the egg into a small container and gently stir in some extras like ground peppercorn, sea salt, herbs, and spices — whatever strikes your fancy. You can even add things like cheese or very, very finely chopped veggies, but we prefer to stick to the small stuff, as cooking times will remain relatively the same as if you were to cook the egg as is simply.
Just be careful not to break the yolk. The thing is sensitive — why do you think it's encased in so many layers of albumen? Once you've added all that you're going to add, it's poaching time.
Just Add Toast
Toast is one of the most obvious uses for a poached egg. Serve with avocado and arugula on toasted sourdough. Top with tomatoes and scallions, and you've got the world's prettiest avocado toast.
Amp up your breakfast sandwich game and replace your fried egg with a poached one. While the runny yolk gets messy, the upgrade is noticeable — the perfect complement to toasted bread, bacon and melted cheese.
Or just grab and go by adding to an English muffin. Or think Italian and add eggs to a couple slices of toasted baguette, topping with parmesan and a healthy dollop of marinara.
In any case, the toasting possibilities are endless.
Serve With Veggies
Whip up an arugula salad with fresh basil, heirloom tomatoes and goat cheese. Grill some asparagus or roast some fingerling potatoes and Brussels sprouts. Top it all off with an egg. The beauty of poached eggs is they work just as well with raw greens as they do in a hearty grain bowl.
A poached egg can make bland steamed vegetables sing — just nestle it on top of whatever you've got on hand and, just like that, you've got a gorgeous meal any bruncher would proudly document with her iPhone.
Tacos — Breakfast or Otherwise
A great place for a poached egg is breakfast tacos, tostadas and in Huevos Rancheros. Mixing the egg with favorites like avocado, chorizo and beans is a good call, as these elements can take on that hot flow of yolk.
Change Up Your Poaching Liquid
Don't limit yourself to boring old water. The poaching liquid can be just about anything. Use your favorite milk and add turmeric for a pungent hint of spice. Try bone or veggie broth, wine or tomato juice. Add lemon or orange to basic poaching water. You get the idea. Changing your liquids is an easy way to impart some nuance into the humble egg.
Ready to Make Your Own Poached Eggs?
We've sure been talking about poached eggs for a while, and we don't blame you if you're starting to work up a serious appetite. We may be a little biased about the egg and its many virtues, from its affordability to its versatility, but they’re undeniably the ideal food.
Sauder eggs are available fresh and ready to poach in the greater Lancaster area. From organic to hard-cooked, we know eggs are the perfect breakfast, lunch or snack item. They’re low in calories, high in protein and delicious alongside all your favorite foods.


 And poached eggs with their gooey insides and tender outer whites are something to behold. A seemingly complicated take on a relatively simple food. So what, exactly does poaching entail?
Is poaching the same as making a soft-boiled egg? Well, not exactly. A soft-boiled egg, though it's also cooked in water and features a runny yolk, is cooked entirely within the shell. Poached eggs are boiled in water — sans shell the entire time. Well, except for the great Julia Child's recipe, but we'll get to that later.
Poached eggs are typically cracked into barely simmering water — in a pot, pan or poacher — and swirled gently until cooked. Eggs cook for two to four minutes depending on your preference and are ready to be featured in any manner of salads, toasts and more.
Here are several methods for making poached eggs — more than you'll ever need.
And poached eggs with their gooey insides and tender outer whites are something to behold. A seemingly complicated take on a relatively simple food. So what, exactly does poaching entail?
Is poaching the same as making a soft-boiled egg? Well, not exactly. A soft-boiled egg, though it's also cooked in water and features a runny yolk, is cooked entirely within the shell. Poached eggs are boiled in water — sans shell the entire time. Well, except for the great Julia Child's recipe, but we'll get to that later.
Poached eggs are typically cracked into barely simmering water — in a pot, pan or poacher — and swirled gently until cooked. Eggs cook for two to four minutes depending on your preference and are ready to be featured in any manner of salads, toasts and more.
Here are several methods for making poached eggs — more than you'll ever need.
 When your eggs are cooked, you’re out of the woods — for the most part. Because the eggs cook in water, you’ll have to make sure things dry out before serving. Little reserves of water build up in parts of the eggs, and serving them as is will lead diners to believe they’re getting a poor example of the dish. Waterlogged eggs with a runny yolk — a little icky, right?
Good thing it’s an easy fix. Gently take those eggs out of whatever vessel they cooked in using a slotted spoon. Place your eggs on top of a clean kitchen towel or its paper equivalent. If you do use a paper towel, use the good stuff. The flimsier brands tend to stick to the eggs, and you don't want to be eating bits of paper along with all your hard work.
Pat the tops of those eggs dry with a separate cloth or paper towel. And voila, you're ready to serve those babies up.
When your eggs are cooked, you’re out of the woods — for the most part. Because the eggs cook in water, you’ll have to make sure things dry out before serving. Little reserves of water build up in parts of the eggs, and serving them as is will lead diners to believe they’re getting a poor example of the dish. Waterlogged eggs with a runny yolk — a little icky, right?
Good thing it’s an easy fix. Gently take those eggs out of whatever vessel they cooked in using a slotted spoon. Place your eggs on top of a clean kitchen towel or its paper equivalent. If you do use a paper towel, use the good stuff. The flimsier brands tend to stick to the eggs, and you don't want to be eating bits of paper along with all your hard work.
Pat the tops of those eggs dry with a separate cloth or paper towel. And voila, you're ready to serve those babies up.
 But you should only stir the water before the eggs hit the pan, not during. Attempting to keep the whirlpool going while the eggs are already in play isn't bound to work out. The idea of this method is to keep the egg whites tucked around the yolk, creating a perfectly oblong egg with no scraggly white wisps in sight.
Remember: It's a quick flick of the wrist, and that's it.
But you should only stir the water before the eggs hit the pan, not during. Attempting to keep the whirlpool going while the eggs are already in play isn't bound to work out. The idea of this method is to keep the egg whites tucked around the yolk, creating a perfectly oblong egg with no scraggly white wisps in sight.
Remember: It's a quick flick of the wrist, and that's it.
 A simmer is what you’re going for. It’s that point where the water is hot, on the verge of boiling, but you’re just getting those teensy bubbles on the base of the pan.
 Of course, all this talk about freshness begs the question: How long will an egg keep? The short answer is eggs last for a really long time. They're protected in that shell, and if you keep them in the fridge, they'll keep for about four to five weeks beyond the pack date. And as far as food safety is concerned, if an egg slips past the use-by date, it’s generally no big deal.
But poached eggs are a sensitive beast. You’ll want to pay attention in this area, as you’re not relying on the power of butter to make these taste better. Eggs must be chilled as soon as possible after you make a purchase.
Speaking of which, how do you identify a high-quality egg? Well, buying organic is a good start, and of course, checking for cracks or imperfections. Additionally, if you're poaching, best results will come from eggs closest to the pack date.
Of course, all this talk about freshness begs the question: How long will an egg keep? The short answer is eggs last for a really long time. They're protected in that shell, and if you keep them in the fridge, they'll keep for about four to five weeks beyond the pack date. And as far as food safety is concerned, if an egg slips past the use-by date, it’s generally no big deal.
But poached eggs are a sensitive beast. You’ll want to pay attention in this area, as you’re not relying on the power of butter to make these taste better. Eggs must be chilled as soon as possible after you make a purchase.
Speaking of which, how do you identify a high-quality egg? Well, buying organic is a good start, and of course, checking for cracks or imperfections. Additionally, if you're poaching, best results will come from eggs closest to the pack date.
 The whirlpool tends to work best if you're only making a single egg at one time. Otherwise, the multiple moving parts may collide, resulting in a batch of eggs sure to disappoint.
If you're making a bigger batch — and honestly, why just make one poached egg? — you'll instead heat the salt and vinegar with the water in a large, non-stick skillet. And no, you're not going to stir.
In any case — one egg or six — you'll want to let them poach. Cover the pan and cook for around four minutes. And during that time, do not lift the lid, poke your eggs or otherwise engage with them. When the timer goes off, remove the egg from the heat using a slotted spoon and serve.
If you'd like to save some eggs for later, move your eggs to an ice bath and place them in the fridge. They'll only keep for about eight hours, so try to eat them within the same day.
The whirlpool tends to work best if you're only making a single egg at one time. Otherwise, the multiple moving parts may collide, resulting in a batch of eggs sure to disappoint.
If you're making a bigger batch — and honestly, why just make one poached egg? — you'll instead heat the salt and vinegar with the water in a large, non-stick skillet. And no, you're not going to stir.
In any case — one egg or six — you'll want to let them poach. Cover the pan and cook for around four minutes. And during that time, do not lift the lid, poke your eggs or otherwise engage with them. When the timer goes off, remove the egg from the heat using a slotted spoon and serve.
If you'd like to save some eggs for later, move your eggs to an ice bath and place them in the fridge. They'll only keep for about eight hours, so try to eat them within the same day.
 If you're a beginner, you've probably noticed those whites getting wispy. It's not a deal breaker. The egg remains edible, but it does make for a sloppy presentation and more room for water to get into the various nooks and crannies that just wouldn't exist with a tighter egg.
So, back to Julia's method. The idea is to eliminate that scraggly white stream trailing behind your egg. You'll need a few things to get going: a pin and a timer, as well as a slotted spoon, a pot and a few eggs.
Your first step? Fill the pot with water and bring it to a boil.
Now, the pin enters the equation. Make a small hole in the eggshell using the pin. The hole needs to be small enough that the egg boils without expelling any precious fluid. The purpose of the hole is to release any air that exists inside the egg that may cause it to crack.
Add eggs — shell and all — and boil for specifically 10 seconds and remove from heat. The purpose of boiling is to help the egg retain its shape after it's cracked into the simmering water. The short amount of time it spends boiling allows it the whole egg to stick together in the face of losing its shell.
Reduce the heat, bringing the once-boiling water down to a simmer. Then, poach as usual. Crack the egg carefully into the simmering pan, cooking for just a few minutes.
What's great about this method is after you've boiled the eggs for the 10 seconds, you can then poach however you like. You don't need any specialized equipment, and the boiling makes that even more valid than before, but you're still welcome to use whatever egg cups, rings, pans that work for you.
If you're a beginner, you've probably noticed those whites getting wispy. It's not a deal breaker. The egg remains edible, but it does make for a sloppy presentation and more room for water to get into the various nooks and crannies that just wouldn't exist with a tighter egg.
So, back to Julia's method. The idea is to eliminate that scraggly white stream trailing behind your egg. You'll need a few things to get going: a pin and a timer, as well as a slotted spoon, a pot and a few eggs.
Your first step? Fill the pot with water and bring it to a boil.
Now, the pin enters the equation. Make a small hole in the eggshell using the pin. The hole needs to be small enough that the egg boils without expelling any precious fluid. The purpose of the hole is to release any air that exists inside the egg that may cause it to crack.
Add eggs — shell and all — and boil for specifically 10 seconds and remove from heat. The purpose of boiling is to help the egg retain its shape after it's cracked into the simmering water. The short amount of time it spends boiling allows it the whole egg to stick together in the face of losing its shell.
Reduce the heat, bringing the once-boiling water down to a simmer. Then, poach as usual. Crack the egg carefully into the simmering pan, cooking for just a few minutes.
What's great about this method is after you've boiled the eggs for the 10 seconds, you can then poach however you like. You don't need any specialized equipment, and the boiling makes that even more valid than before, but you're still welcome to use whatever egg cups, rings, pans that work for you.
 The heat should be low enough that you'll get a few simmering bubbles on the bottom of the pan, but no roaring boil. Just those wimpy, tiny bubbles.
Then gently break your egg into the water. You can do this directly if you're feeling confident, or you can crack the egg into a cup and transfer to the poaching liquid. Cook for about three minutes, with no stirring, prodding or even covering. Remove from heat with a slotted spoon and pat dry with a clean towel.
One issue with the frying pan method is it's not the prettiest poached egg. If the presentation is the name of the game, we'd suggest going with a poaching pan or rings instead. These eggs look a bit like a fried egg and feature a more visible yolk than you'll see in some of the other methods.
The heat should be low enough that you'll get a few simmering bubbles on the bottom of the pan, but no roaring boil. Just those wimpy, tiny bubbles.
Then gently break your egg into the water. You can do this directly if you're feeling confident, or you can crack the egg into a cup and transfer to the poaching liquid. Cook for about three minutes, with no stirring, prodding or even covering. Remove from heat with a slotted spoon and pat dry with a clean towel.
One issue with the frying pan method is it's not the prettiest poached egg. If the presentation is the name of the game, we'd suggest going with a poaching pan or rings instead. These eggs look a bit like a fried egg and feature a more visible yolk than you'll see in some of the other methods.
 But poaching an egg in the microwave comes with its own set of rules. Fortunately, they are pretty easy to follow. Home cooks and pros alike swear by the micro-poaching method. It’s foolproof, they say — great for a quick bite, a lunch egg.
All in all, cooking a poached egg in the microwave is a pretty quick and easy thing to do. For one, it only takes about thirty seconds, but if you’re not careful, you may find that your egg explodes or quickly turns to rubber. Here is a method you can live by.
First break your egg into a ramekin, then cover with a small dish or a bit of plastic wrap. Place in the microwave for 30 seconds and let stand.
If the white hasn’t fully set, you’ll want to try cooking the egg for another 10 seconds. That’s it. The challenge is, you don’t want to overcook the egg, so first-timers, try cooking at intervals. Start off at 25 seconds and build, just until the white has set — adding five or 10 seconds at a time.
The method we outlined above does not require water, just an egg and a small covered dish. But some cooks prefer to add a touch of water to their poaching game.
Here’s how you can try this alternative way yourself: Put a small amount of water into a mug or a ramekin. In a separate container, break the egg, then gently transfer to the bowl holding the water. Microwave on high for about 30 seconds. Remove from ramekin, then add your salt and pepper.
Again, all microwaves were not created equal, and it may take some experimentation to figure out the best time for cooking your eggs.
But poaching an egg in the microwave comes with its own set of rules. Fortunately, they are pretty easy to follow. Home cooks and pros alike swear by the micro-poaching method. It’s foolproof, they say — great for a quick bite, a lunch egg.
All in all, cooking a poached egg in the microwave is a pretty quick and easy thing to do. For one, it only takes about thirty seconds, but if you’re not careful, you may find that your egg explodes or quickly turns to rubber. Here is a method you can live by.
First break your egg into a ramekin, then cover with a small dish or a bit of plastic wrap. Place in the microwave for 30 seconds and let stand.
If the white hasn’t fully set, you’ll want to try cooking the egg for another 10 seconds. That’s it. The challenge is, you don’t want to overcook the egg, so first-timers, try cooking at intervals. Start off at 25 seconds and build, just until the white has set — adding five or 10 seconds at a time.
The method we outlined above does not require water, just an egg and a small covered dish. But some cooks prefer to add a touch of water to their poaching game.
Here’s how you can try this alternative way yourself: Put a small amount of water into a mug or a ramekin. In a separate container, break the egg, then gently transfer to the bowl holding the water. Microwave on high for about 30 seconds. Remove from ramekin, then add your salt and pepper.
Again, all microwaves were not created equal, and it may take some experimentation to figure out the best time for cooking your eggs.
 Poaching pans come in a range of sizes, from a two- or three-egg operation to larger six-egg configurations. They are a great way to make multiple eggs at once without crowding the pan.
 On top of the taste factor, boiling vinegar water fills your kitchen with the smell of vinegar. So, rather than filling your home with the warm scent of what's on the table, you'll instantly be reminded of all those times you dyed Easter eggs as a child.
That said, some people swear by this method, smell and all, and believe those extra drops make all the difference.
3. You Definitely Need to Swirl Water Before Poaching the Eggs
Don't do this — while the classic poaching method relies on eggs being gently swirled, swirling the water is going to agitate the proteins inside the egg. The gentler the environment, the better. A whirlpool — well, that'll just make things fall apart pretty darn fast.
On top of the taste factor, boiling vinegar water fills your kitchen with the smell of vinegar. So, rather than filling your home with the warm scent of what's on the table, you'll instantly be reminded of all those times you dyed Easter eggs as a child.
That said, some people swear by this method, smell and all, and believe those extra drops make all the difference.
3. You Definitely Need to Swirl Water Before Poaching the Eggs
Don't do this — while the classic poaching method relies on eggs being gently swirled, swirling the water is going to agitate the proteins inside the egg. The gentler the environment, the better. A whirlpool — well, that'll just make things fall apart pretty darn fast.
 Eating them plain is always an option — delicious, basic and perfect for the egg lover on the move. But if you'd like to slow down and celebrate your ability to take on a new egg-related challenge, we've got a few ideas for dressing up the perfect poached egg. Well, they don't have to be perfect.
Poach in Some Extras
Feeling a little fancy? Embrace it and add some additional flavor to your egg. The best way to do this is to crack the egg into a small container and gently stir in some extras like ground peppercorn, sea salt, herbs, and spices — whatever strikes your fancy. You can even add things like cheese or very, very finely chopped veggies, but we prefer to stick to the small stuff, as cooking times will remain relatively the same as if you were to cook the egg as is simply.
Just be careful not to break the yolk. The thing is sensitive — why do you think it's encased in so many layers of albumen? Once you've added all that you're going to add, it's poaching time.
Just Add Toast
Toast is one of the most obvious uses for a poached egg. Serve with avocado and arugula on toasted sourdough. Top with tomatoes and scallions, and you've got the world's prettiest avocado toast.
Amp up your breakfast sandwich game and replace your fried egg with a poached one. While the runny yolk gets messy, the upgrade is noticeable — the perfect complement to toasted bread, bacon and melted cheese.
Or just grab and go by adding to an English muffin. Or think Italian and add eggs to a couple slices of toasted baguette, topping with parmesan and a healthy dollop of marinara.
In any case, the toasting possibilities are endless.
Serve With Veggies
Whip up an arugula salad with fresh basil, heirloom tomatoes and goat cheese. Grill some asparagus or roast some fingerling potatoes and Brussels sprouts. Top it all off with an egg. The beauty of poached eggs is they work just as well with raw greens as they do in a hearty grain bowl.
Eating them plain is always an option — delicious, basic and perfect for the egg lover on the move. But if you'd like to slow down and celebrate your ability to take on a new egg-related challenge, we've got a few ideas for dressing up the perfect poached egg. Well, they don't have to be perfect.
Poach in Some Extras
Feeling a little fancy? Embrace it and add some additional flavor to your egg. The best way to do this is to crack the egg into a small container and gently stir in some extras like ground peppercorn, sea salt, herbs, and spices — whatever strikes your fancy. You can even add things like cheese or very, very finely chopped veggies, but we prefer to stick to the small stuff, as cooking times will remain relatively the same as if you were to cook the egg as is simply.
Just be careful not to break the yolk. The thing is sensitive — why do you think it's encased in so many layers of albumen? Once you've added all that you're going to add, it's poaching time.
Just Add Toast
Toast is one of the most obvious uses for a poached egg. Serve with avocado and arugula on toasted sourdough. Top with tomatoes and scallions, and you've got the world's prettiest avocado toast.
Amp up your breakfast sandwich game and replace your fried egg with a poached one. While the runny yolk gets messy, the upgrade is noticeable — the perfect complement to toasted bread, bacon and melted cheese.
Or just grab and go by adding to an English muffin. Or think Italian and add eggs to a couple slices of toasted baguette, topping with parmesan and a healthy dollop of marinara.
In any case, the toasting possibilities are endless.
Serve With Veggies
Whip up an arugula salad with fresh basil, heirloom tomatoes and goat cheese. Grill some asparagus or roast some fingerling potatoes and Brussels sprouts. Top it all off with an egg. The beauty of poached eggs is they work just as well with raw greens as they do in a hearty grain bowl.
 A poached egg can make bland steamed vegetables sing — just nestle it on top of whatever you've got on hand and, just like that, you've got a gorgeous meal any bruncher would proudly document with her iPhone.
Tacos — Breakfast or Otherwise
A great place for a poached egg is breakfast tacos, tostadas and in Huevos Rancheros. Mixing the egg with favorites like avocado, chorizo and beans is a good call, as these elements can take on that hot flow of yolk.
A poached egg can make bland steamed vegetables sing — just nestle it on top of whatever you've got on hand and, just like that, you've got a gorgeous meal any bruncher would proudly document with her iPhone.
Tacos — Breakfast or Otherwise
A great place for a poached egg is breakfast tacos, tostadas and in Huevos Rancheros. Mixing the egg with favorites like avocado, chorizo and beans is a good call, as these elements can take on that hot flow of yolk.
 Sauder eggs are available fresh and ready to poach in the greater Lancaster area. From organic to hard-cooked, we know eggs are the perfect breakfast, lunch or snack item. They’re low in calories, high in protein and delicious alongside all your favorite foods.