How To Blow Out an Egg
Posted on: April 4th 2018
- Overview
- Methods on How to Remove the Inside of an Egg
- How to Empty the Inside of an Egg Without Cracking It
- Safety Tips for Working With Raw Eggs
- What to do With the Insides Once Finished
- Materials to Decorate Empty Eggshells
- Methods to Decorate Hollowed-Out Eggshells
- The Tradition and Culture of Blowing Eggs
- The History of Eggs
Blown Easter egg ornaments are a great idea for your next Easter craft project. In fact, hollowing out eggs and decorating them is a fun craft activity any time of the year. And you can preserve blown out eggs for years after you make them because, without the egg yolk or white, they don’t spoil. For this project, you need completely empty eggshells.
The key here is to learn how to empty an egg without breaking the shell — and that can get a little tricky. Below is a detailed guide to help you do this effectively and safely, as well as a few decorating tips.
Around Easter — and even at other times of the year — you need empty eggshells for lots of plans. Some people may overlook this type of project because they’re a little leery of blowing out the egg’s contents from the shell. But it’s not as difficult as it sounds. You just need to learn how to do it properly. You don’t even have to use your mouth if you don’t want to!
Overview: Process of Blowing Out an Egg
We’ll get into more detailed step-by-step instructions below, but it helps to first have an overview of the process.
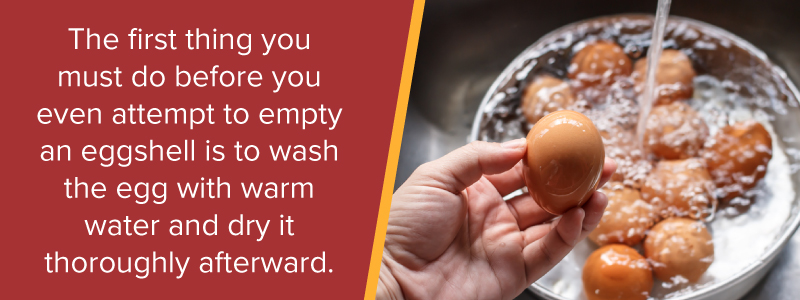
The first thing you must do before you even attempt to empty an eggshell is to wash the egg with warm water and dry it thoroughly afterward. Then, you’ll use a sharp object, such as a needle or skewer, to poke a small hole into the egg on the small end and a slightly larger hole on the large end. You’ll want to ensure the hole is big enough that you can effectively blow out all the egg’s contents. In addition, be sure to break the yolk with the needle.
You’ll then either shake the egg over a bowl from the large end until all the inside contents come out, use your mouth to blow them out or apply a baster to push them out. If you can’t get the contents out easily, you may need to insert the needle back into the egg to make sure you break the yolk and shell membranes better. Once the contents are all out of the egg, use cool water to rinse the now empty shell and allow it to dry. Remember, your eggshell is going to be fragile, so be gentle when decorating it.
Now that you have the basics down on how to remove the inside of an egg from the shell, let’s get into specific steps and methods of doing so.
Methods on How to Remove the Inside of an Egg
There’s really only one method to hollow out eggshells. The only real difference across strategies is the tools you use to make the hole and blow out the egg contents. For instance, to make the hole, you can use any one of the following:
- Skewer
- Egg pricker
- Hand drill
- Toothpick
- Pin
- Thumbtack
- Awl
- Needle
- Utility knife
- Nail
- Straightened paperclip
As for how to remove the inside of an egg without breaking it, you can use a baby aspirator, rubber ear syringe, baster or your lungs to blow the inside contents out.
How to Empty the Inside of an Egg
Here are the step-by-step instructions for properly blowing out an egg.
Step 1: Get Some Sauder Eggs
Wash them and dry them before you begin.
Step 2: Use One of the Tools Above to Poke a Couple of Holes in a Raw Egg of Regular Size
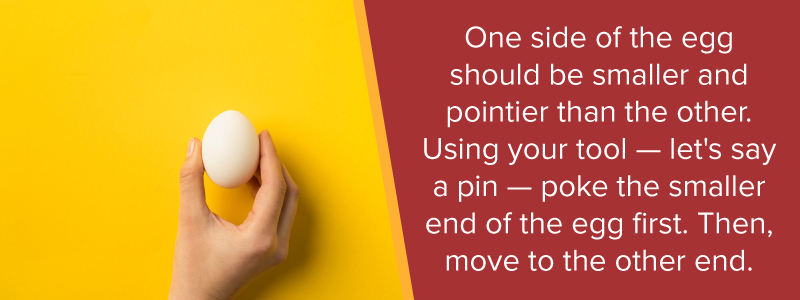
One side of the egg should be smaller and pointier than the other. Using your tool — let’s say a pin — poke the smaller end of the egg first. Then, move to the other end.
You then need to make the holes bigger so that the egg innards can come out. For this to work, you can either continue using your pin or apply a couple of large, round nails — a two mm (1/12″) thick one and a four mm (1/6″) thick one.
Before you use the nails, use an emery board or file to sharpen the ends of them, creating four sharp edges. Using the nail, make the hole you plan on blowing just a little bit larger and the end hole only a slight bit larger. If done correctly, the end hole should be around twice the size of your initial hole.
Some tips:
- Place some cellophane, scotch tape, band-aid or adhesive plaster on your egg where you’re going to make the hole to keep your eggshell from cracking.
- As another option, pierce your egg with a small drill bit in a hand (not power) drill. Twirl small rotary tools like a Dremel between your fingers. Gently scrape it down. Don’t punch in, tear or snag the shell with the flutes.
- Ensure the bit is a metal-like carbide or single solid metal piece rather than grit-covered since it could otherwise contaminate your extracted egg.
- Check for weak spots around the eggshell — they could be a little gray. If there aren’t any, choose an area next to the middle of the egg’s ends to poke holes into.
- Grip the egg firmly without breaking it. Use your non-dominant hand, as you’ll use your dominant hand to stick the nail in, applying even and slow pressure.
- Use fine grain sandpaper to rub the egg on in order to thin the shell to make poking holes in the shell easier. Doing this will make penetrating the shell easier using a paperclip or heavy pin. Using a paperclip will make it easier to break the yolk inside and blow it out.
Step 3: Get Into the Bigger Hole
To complete this step, use any of the following:
- Toothpick
- Needle
- Small balloon pump
- Paperclip, straightened
- Wire
Pierce the yolk while breaking up the membranes. Continue pushing the tool repeatedly in and out of the hole.
Step 4: Figure Out How You’re Going to Blow Out Your Egg
People frequently use their mouth or a small coffee straw, but even a syringe will work for pushing air into the hole. If you’d rather not use your mouth, select any one of the following tools:
- Injection syringe (with no attached needle)
- Ear bulb syringe
- Egg blower
- Glue syringe
- Small air compressor, like you would use for airbrushing or tire inflation
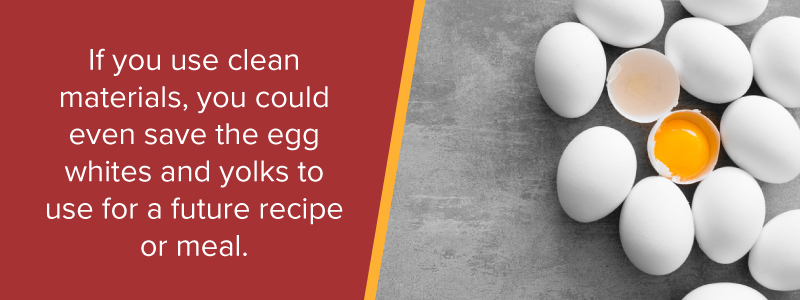
Step 5: Catch the Egg’s Insides With a Jar or Wide Bowl
When you’re blowing, hold the egg directly above a jar or bowl. If you use clean materials, you could even save the egg whites and yolks to use for a future recipe or meal.
Step 6: Hold the Coffee Straw to the Little Hole If You’re Using the Traditional Method
Blow air into the egg through the straw while letting the insides come out the bigger hole. Alternatively, use your mouth to blow air into one of the holes until you completely empty the egg.
Step 7: Hold a Baby Aspirator or Syringe (or Your Mouth) Up to the Little Hole
Push water or air through the hole until the insides of the egg come out. If you use water, you might not be able to save the whites and yolks for future use.
Step 8: Get a Glass of Water and Rinse Out the Eggshell by Pouring Water Over it
After doing so, use your syringe or straw to blow out any remaining egg matter and water. Shake the eggshell gently and repeat the process until you completely clean it. Be sure you’re holding the egg over a bowl while you do this. If you do decide to save the eggs for a future recipe, catch the water in a separate wide bowl, or just hold the egg over the sink.
Step 9: Dry the Unbroken Eggshells
You could dry them in your microwave for around 15 to 30 seconds on high or bake them in the oven for about 10 minutes at 300 degrees Fahrenheit (150 degrees Celsius). This process could even make them a little stronger. If you don’t want to go this route, simply let them drain for a couple of days with the bigger hole facing downward.
Step 10: Apply a Couple of Coats of Mod Podge on the Inside and Outside of the Eggshell (Optional Step)
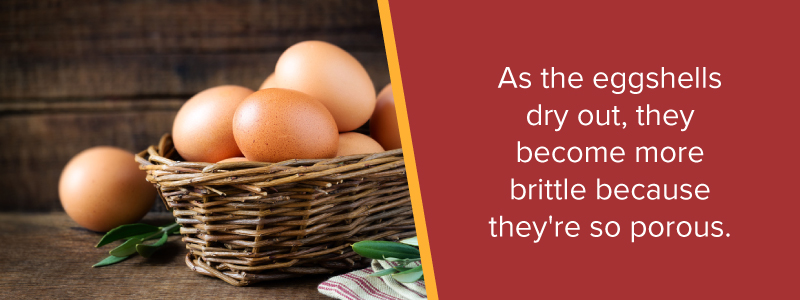
The inside is the most important part. As the eggshells dry out, they become more brittle because they’re so porous. By sealing the eggshell from the inside and outside, you’ll allow the Mod Podge to soak into the eggshell, strengthening the surface by creating a web-like bond. It will almost be like plastic when done. Your eggs will be strong but delicate and can last for years.
That’s all there is to it. You’re now ready to decorate your eggshells and put them on display.
Safety Tips for Working With Raw Eggs
When blowing out your eggshells, you have to be cautious since raw eggs could contain Salmonella. Here are some tips to safely work with eggs:
- Wash your egg in hot water to destroy any bacteria potentially on the shell. Afterward, rinse it with a solution of 1/2 cup of water and a teaspoon of liquid bleach. Salmonella can be on both the inside and outside of eggs. Therefore, it’s essential that you take precautions against cross-contamination before cooking them. You also need to store both uncooked and cooked eggs properly.
- Open the carton of eggs up to ensure all the eggshells are intact before you buy them, and select the freshest eggs possible.
- Refrigerate your eggs at 40 degrees Fahrenheit or colder.
- Wash your hands well, and ensure your kids wash theirs too before and after you handle uncooked shell eggs.
- Use food-safe decorating materials and food-grade dyes only. Make the water warmer than your eggs when dying them so that they won’t absorb the dye water.
- Wash your hands thoroughly when you cook, cool, dye and decorate the eggs.
- Put eggs in the refrigerator within two hours after you decorate them. You may store the eggs in the fridge for up to a week, but avoid storing them in the door.
- Serve cooked, dyed eggs in braided breads used as decorations within two hours after you bake them, or refrigerate them and eat them within four days. You may want to consider having a set of eggs for decorating and eating and another set for decorating and hunting. Or, to be extra safe, use plastic eggs instead of real ones for your Easter egg hunt.
- Be sensible when hiding real eggs outside — don’t put them where birds, animals or lawn chemicals can come in contact with them. Don’t hide any cracked eggs since bacteria could get inside them and contaminate them. Don’t exceed two hours when hiding and hunting for the eggs.
- Eat hard-cooked, properly refrigerated eggs within seven days.

Your eggs should be safe to eat as long as you shield them from bacteria and store them in the fridge. If the eggs crack when you cook them, don’t color them — they’re fine to eat if you refrigerate them immediately. If you don’t, however, it’s too easy for bacteria to get into them. Regardless if you use your eggs as a centerpiece or hide them for an Easter egg hunt, discard them if you leave them out for over two hours at room temperature.
What To Do With Insides Once Finished
Once finished decorating, cover the liquid eggs and store them in your refrigerator for future use. Then, use them for scrambled eggs, egg pie, cake or other delicious meals.
If a recipe includes mixed whites and yolks and calls for thorough cooking, use the eggshell’s emptied contents immediately. Many baked recipes are good options for using the emptied eggs, such as:
- Custards
- Cakes
- Casseroles
- Breads
- Quiches
Check out our recipe section for inspiration and ideas on the delicious foods you can make with Sauder eggs.
Decorating Techniques for Blown-Out Eggs
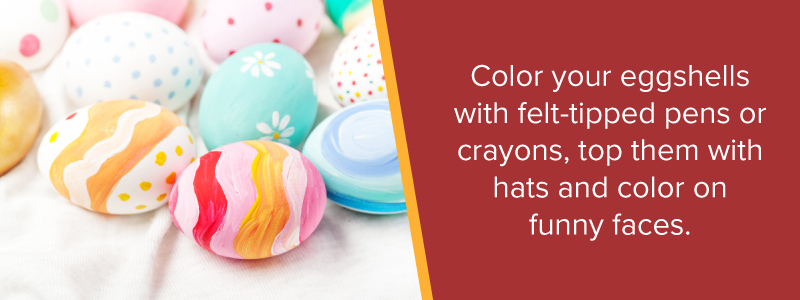
When it comes to decorating, your creative possibilities are endless. Color your eggshells with felt-tipped pens or crayons, top them with hats and color on funny faces. Paint your eggs, trim them with sequins or feathers or just dye them in a whole range of hues. No matter how you do it, eggshell decorating is just as fun for adults as it is for children. Here are some ideas:
Flecked Eggs
Fleck tan acrylic paint on undyed farm eggs using a small paintbrush — thin the paint with a little water. After you dry them, use a gold paint pen to handwrite guests’ initials and place them on twigs and moss to display them as place cards. You could also add texture and height to your table by placing them on candlesticks.
Lettuce Ware Eggs
Use green acrylic paint to paint the whole eggshell. Allow it to dry, and use a thin-tipped white paint pen to draw “veins.”
Fruit and Veggie Eggs
Fruit and veggie eggs are a really cute creation. You dye your eggs a solid color and use a permanent marker to make the details. Then, add paper stems and leaves in a variety of colors and shapes.
Tissue Paper Eggs
Cut out different patterns from colored tissue paper to create unique egg designs. Try floral looks, decorative edges or basic zigzags. Apply decoupage medium (thin coat) on an egg. Gently position and pat the tissue paper cutouts into place, working your way out from the center of your design.
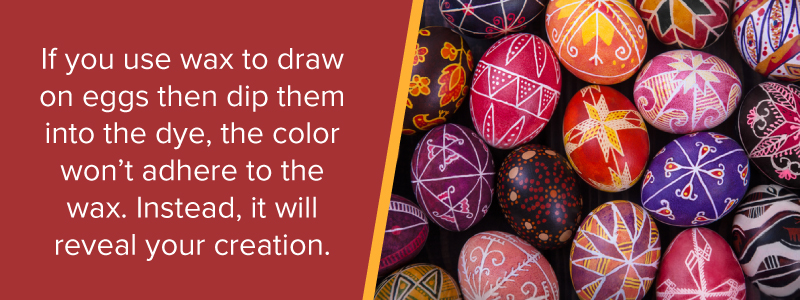
Wax-Resistant Eggs
If you use wax to draw on eggs then dip them into the dye, the color won’t adhere to the wax. Instead, it will reveal your creation.
Materials to Decorate Empty Eggshells
Along with your colored dye, you’ll need the following materials for these decorative eggshells.
Lettuce Ware Eggs:
- Green acrylic paint
- White paint pen
Fruit and Veggie Eggs:
- Colored paper
- Permanent marker
Flecked Eggs:
- Small paintbrush
- Tan acrylic pain
- Gold paint pen
Tissue Paper Eggs:
- Colorful tissue paper
- Decoupage medium
Naturally-Dyed Eggs:
- Cranberries
- Fresh beets
- Frozen raspberries
- Fresh spinach leaves
- Red or purple grape juice
- Fine sieve
- Cheesecloth
- White vinegar
Wax-Resistant Eggs:
- Wax stylus, beeswax patty or candle
- Paper towel or newspaper
Silk-tie eggs:
- Small to medium raw eggs
- Blouses, silk ties or boxers
- Enamel or glass pot
- Twist ties
- White sheets, old tablecloths or pillowcases
- Vegetable oil
- Three tablespoons of white vinegar
- Spoon or tongs
- Paper towels
- Warm water
Methods to Decorate Hollowed-Out Eggshells
A few methods for decorating your hollowed-out eggshells are as follows.
Silk-Tie Eggs
Here’s Martha Stewarts silk-tie egg method:
- Cut the silk into a piece or square big enough to wrap around your raw egg.
- Wrap a piece of silk around a raw egg, ensuring the material’s printed side is facing the egg. You may still use silk if it doesn’t fit around your egg perfectly.
- Place the egg wrapped in silk in a piece of a white pillowcase, old tablecloth or sheet and use a twist-tie to secure it tightly.
- Place your egg in a glass or enamel pot. Pour water into a pot until you completely cover the eggs, and add the three tablespoons of white vinegar.
- Let the water come to a boil, then turn the heat down and simmer your eggs for 20 minutes. If you plan to eat them, simmer them longer.
- Use a spoon or tongs to remove the eggs from the water and let them cool.
- Take the silk off the cooled egg.
- Wipe vegetable oil on the eggs if you want them to be shiny after you complete step seven.
Naturally Dyed Eggs
To make naturally dyed eggs, you add in a handful or more of cranberries, frozen raspberries or fresh beats in a saucepan, according to the American Egg Board. For each handful, add around a cup of water. The water should be a minimum of an inch above the dye materials. Bring the water to a boil, and then lower the heat and simmer for anywhere from 15 minutes up to one hour — until you get your desired shade. Eggs will come out a lighter shade. After the time is up, take the pan off the heat.

Using a fine sieve or cheesecloth, strain your dye mixture into a bowl deep enough to cover your eggs completely. For every cup of dye liquid, add two to three teaspoons of white vinegar. Use a wire egg holder or spoon to place your eggs into the hot water mixture. Allow them to soak until they reach the color you want.
If your eggshells are empty, rotate or stir them to ensure even coloring. Using the wire egg holder or a slotted spoon, take the eggs out of the water and place them in a drainer or rack. Let them sit until they’re thoroughly dry. Within two hours or less, put the eggs you’re planning to eat inside your refrigerator.
The Tradition and Culture of Blowing Eggs
People have been embracing Easter traditions for centuries. Egg decoration goes back as far as the 13th century. Since many cultures celebrate similar traditions, and people’s interest in eggs has been around for a long time, it’s quite possible that traditions of egg decorating were even celebrated by our earliest ancestors while they were migrating out of Africa. Regardless of the truth in this idea, it’s true that many cultures celebrate egg decorating.
The Easter egg tradition of the Ukrainian maintains a little bit of the cultural symbolism, and the fascination of egg decorating that was quite common throughout Eurasia is still going strong today in some places. The tradition was decorating raw eggs and allowing the contents of the eggs dry out. Today, people typically use blown eggs. The eggs are given as gifts to protect the recipient’s health. Many homes commonly display a bowl of decorated eggs throughout the year since they “bring health” to those living in the homes.
New forms of egg decoration continue to develop, and older methods revive. Therefore, you have a whole range of options to try. Blowing eggs is just one method, and anyone — with or without religion — can try this as a craft.
History of Eggs
Since in the evolutionary chain birds came before man, both birds and eggs have been around longer than historians. According to East Indian history, as early as 3200 BC, wild jungle fowl were tamed. Also written by historians was that people ate fowl more than they did eggs because they saved the eggs for hatching to maintain fowl population. Chinese and Egyptian records indicate in 1400 BC, fowl were laying their eggs for people.

Almost a couple hundred chicken varieties and breeds exist in the world. However, only several of them are as important economically as egg producers.
Learn More About Egg Blowing, Decorating and Eating
Here at Sauder’s Eggs, we’re proud to provide one of the world’s most perfect foods to consumers from Maryland to Ohio to Pennsylvania to other locations across this great nation. We invite you to peruse our website and its valuable resource about all things eggs. There’s always something new and interesting to learn about our eggs — and eggs in general — by reading our blog. Be sure to sign up for our newsletter too so that you can always stay updated on our eggs.