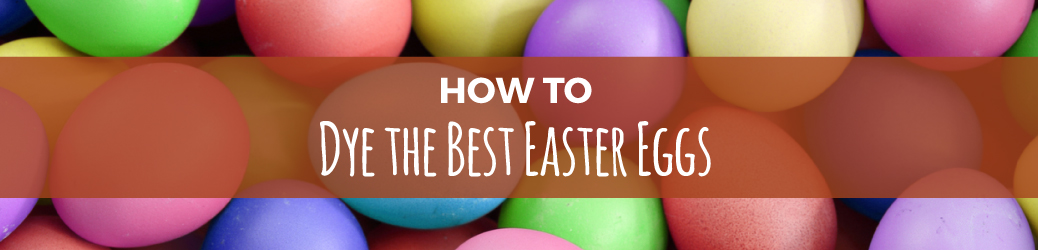
The Best Ways To Dye Easter Eggs
Posted on: April 4th 2018
- Overview
- Back to Basics-The Basics of Egg Dying
- How to Naturally Dye Easter Eggs
- Modern Ways to Dye Easter Eggs
- Fun Ways to Decorate Easter Eggs with paper, Fabric or Other Materials
- Non-Traditional Methods for Decorating Easter Eggs
- Things to Remember When Dying Eggs
- What to do With Eggs After You’ve Dyed Them
- Family Fun With Easter Eggs
Easter is almost here. You’ve bought a new dress, shined your shoes and ironed the tablecloth. Holidays are all about traditions, and there is no bigger Easter tradition than dyeing hardboiled eggs. While you could pick up one of the egg dyeing kits at your grocery store, we’re guessing you’re reading this article because you’re looking for something different. Whether you’re looking for ways to dye your eggs naturally or how to avoid the permanent stains that often result, we’ve got you covered. Even if you’re an artist looking for nontraditional ways to dye Easter eggs or a mom wanting a fun project for her kids, we’re confident at least one of these ideas will be right up your alley.
Basics of Egg Dying
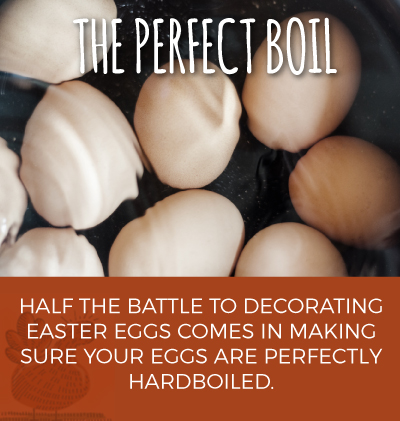 Let’s be honest: Half the battle to decorating Easter eggs comes in making sure your eggs are perfectly hardboiled. There are so many theories and ideas out there about how to make the perfect hardboiled egg. And you may already have a few of your own. But just in case, here’s what home and kitchen maven Martha Stewart recommends:
-
- Place 12 eggs in a large pot and cover them with water. Make sure the water reaches one inch above the tops of the eggs.
- Gradually bring water to a boil over medium heat.
- Once the water begins to boil, remove the pot from the heat.
- Cover the pot with a lid and let eggs sit in the hot water for 12 minutes.
- Place eggs in a colander and run under cold water to stop the cooking process.
If you were just serving hardboiled eggs plain, you could stop at this point. No need to wait. But these are Easter eggs. They’re destined for something special.
Now that you’ve boiled and cooled your eggs, it’s time to let the real fun begin.
How to Naturally Dye Easter Eggs
When naturally dyeing Easter eggs, there are two primary ways to go: use spices or use fruits and veggies. Which you choose, and how you use them, will depend on what kind of color you want to create.
First, let’s talk about how to make egg dye using everyday spices you’ll find in your cabinet.
Recommended ingredients: turmeric, curry powder, paprika, cinnamon, chili powder, dill seed, celery seed, cumin, distilled water, eggs, white distilled vinegar

To create dyes with cooking spices, you’ll need to know which spices will yield which colors. Here’s the breakdown.
- Gold: turmeric
- Light orange: curry powder
- Dark orange: paprika, chili powder
- Brown: cinnamon
- Reddish-brown: chili powder
- Light brown: dill seed
- Yellow: celery seed, cumin
Once you’ve chosen which colors you want to make, it’s time to get to work.
- Hardboil your eggs and allow to cool.
- Take a three-quart pot — one you don’t mind getting stained with the dye — and fill with a quart of water, 2 tablespoons of white vinegar and whatever spice you plan to use.
- Bring the water to a boil.
- Lower heat and allow to simmer for 30 minutes.
- Remove the pot from the burner. If needed, strain the liquid through a cheesecloth or fine mesh sieve.
- Repeat process for each color/spice desired.
- Allow the dyes to cool before you begin coloring your eggs.
Note: Natural dyes will keep for up to one week in the refrigerator. Also, allowing the egg to soak in the dye for 30 minutes or more will result in a richer color. If you’re patient enough, leave the eggs in the dye overnight and see the bold, rich colors that result.
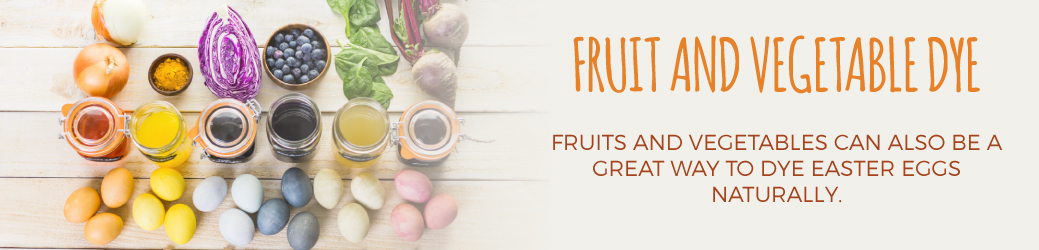
Fruits and vegetables can also be a great way to dye Easter eggs naturally.
Recommended ingredients: Eggs, canned beet juice, canned cherries, blueberries, mulberries and raspberries, red and yellow onions, plums, grape juice, red cabbage, carrots, lemons and oranges, coffee, tea, red wine, spinach, distilled white vinegar
Even though we’ve included a list of recommended ingredients, this process requires a lot of exploration and creativity. Each color can come from several sources, so you can decide which ingredients to purchase and how much of each to use. But, once you get started, you’ll realize you can pretty much achieve any color you want with the right food.
- Red/pink: Canned beet juice, canned cherries in syrup, raspberries, red onion skin, red plums
- Blue: Purple grape juice, red cabbage leaves, blueberries, mulberries, blackberries
- Orange: Yellow onion skin, carrot peels
- Yellow: Lemon and orange peels, green tea, carrot tops
- Brown: Coffee, black tea
- Purple: Red Zinger tea, red wine, red onion skins
- Green: Spinach leaves, red onions — when combined with vinegar, this creates a gorgeous jade green color
The Process of Naturally Dying Eggs:
- Hardboil your eggs and allow to cool.
- Meanwhile, finely chop or grate your ingredients. Place those materials in a pot with water. You’ll want enough water to come one inch above the material in the bottom of the pot.Note: If you’re using coffee or tea, steep or brew with a traditional brewing method. Since you’re brewing it instead of diluting it in the water, the color will be richer, because there is less water to dilute it. You can also skip this step if you’re using berries. If you are using berries, either mash them or juice them, then use the fresh liquid.
- Boil your ingredients. There is no set time for this. The longer you boil, the richer your color. But of course, make sure you keep a close eye on the boiling liquid, and don’t leave the pot to boil dry.
- When finished boiling, strain the leftover material out of the dye using a mesh sieve or cheesecloth.
- Add 2 to 3 teaspoons of vinegar for every cup of colored liquid — for example, 2 cups of dye would require 4 to 6 teaspoons of vinegar.
- Pour the colored liquid into a container deep enough to allow you room to submerge an egg.
- Place egg in the dye and allow to set. The longer you leave it in the container, the richer the color will be. You can even choose to leave them for hours or overnight if you want a darker, more vibrant egg.
The great thing about this method is that you can really get creative. Play around with how much of an ingredient you boil, how long you boil it and even combine colors to create other colors. The sky is the limit, and you can feel good about using chemical-free ingredients around your family. Naturally dyeing Easter eggs is not only fun and creative, but it can leave you with peace of mind if you’re planning to eat the eggs after the fact.
Modern Ways to Dye Easter Eggs
Once you’ve made your dye colors, it’s time to get creative. You could just dip your eggs into your dyes for gorgeous solid colors, or you can incorporate other materials into your decorating to create patterns and variations in color that will leave you with stunning one-of-a-kind eggs.
Note: While many of these options are kid-friendly — and have been marked with an asterisk — there are also some you’ll want to save for a grownups-only decorating party. And, for most of these suggestions, we recommend using gloves to prevent your fingers from getting stained during the dyeing process.
Using String to Dye Eggs
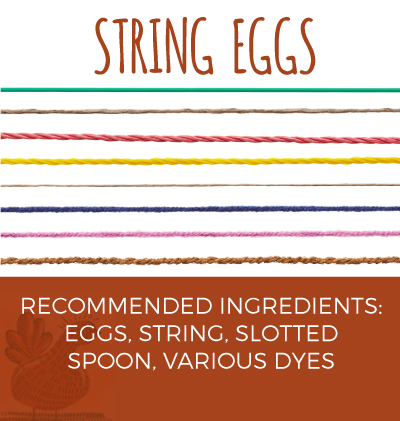
Recommended ingredients: Eggs, string, slotted spoon, various dyes
- Cut a piece of string long enough to wrap around the egg several times.
- Wrap the string tightly around the egg in whatever pattern you desire.
- Tie it off to keep it in place.
- Place the egg on a spoon and lower it into the dye. Allow to soak until your egg is the desired color.
- Remove egg from dye and allow to dry. DO NOT remove the string until the egg is fully dried.
Using Rubber Cement to Dye Eggs
Recommended ingredients: Eggs, rubber cement and brush, slotted spoon, various dyes
- Brush small amounts of rubber cement on the egg.
- Allow rubber cement to dry.
- Once rubber cement is dry, dip the egg into the dye and allow to soak until the egg reaches the desired shade.
- Remove from the dye and dab excess dye off of the egg.
- Quickly remove rubber cement from the egg. Rubbing it gently with your fingers should do the trick, but be careful not to press too hard and crack the egg.
- Briefly dip the egg again, and then allow it to dry.
- Reapply rubber cement and allow to dry.
- Dip egg one more time.
- Let dry and remove remaining rubber cement.
Ombré Eggs
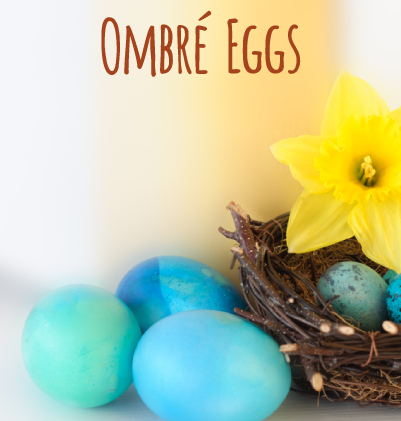
Recommended ingredients: Eggs, slotted spoon, various dyes
- Dunk your egg into the dye color of your choice for five to 10 seconds. Remove it from the dye.
- Lower it 7/8 of the way back into the dye. Keeping it on the spoon, hold it in the dye for 20 to 30 seconds.
- Repeat the process, lowering less of the egg into the dye each time until you are only coloring the bottom portion of the egg.
- Allow eggs to dry in an upright position so the dye won’t run.
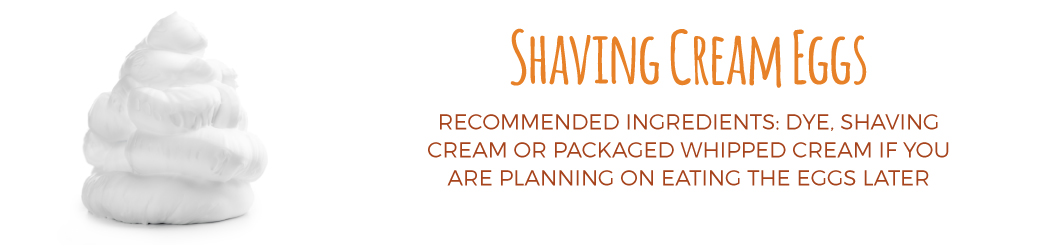
Shaving Cream Eggs*
Recommended ingredients: Dye, shaving cream or packaged whipped cream if you are planning on eating the eggs later
- Spread a generous layer of shaving cream or whipped cream on a flat surface.
- Use the dye to create designs on top of the layer of cream.
- Carefully roll the egg through the cream and dye to pick up the color and create a beautiful marbelized effect.
- Dry completely and then wipe off the remaining cream.
Just Add Margarine*
Recommended ingredients: Egg dye, margarine, kitchen tongs
- Melt 1 tablespoon of margarine and stir it into the egg dye.
- Using tongs, quickly dunk the egg in and out of the dye solution three times.
- Place the egg back into the dye and leave submerged for three to five minutes.
- Remove the egg from the dye and allow to dry completely.
- Once the egg is dry, wipe off remaining margarine with a paper towel.
Using Rubber Bands to Dye Eggs*
Recommended ingredients: Eggs, dye, slotted spoon, wide rubber bands — the ones you get on broccoli at the grocery store are great for this
- 1. Wrap rubber bands around the eggs in your desired pattern.
- 2. Dunk into the dye color of your choice.
- 3. Allow to dry and then remove the rubber band.
- Note: If you plan to reuse the rubber bands, make sure you wash them between each use to avoid getting unwanted colors on your eggs.
Dinosaur Eggs*

Recommended ingredients: Eggs, various dyes, gloves, slotted spoon
- Gently tap and press against the eggshell to intentionally crack it. Be careful not to be too forceful — the idea is to create small cracks, not gaping holes.
- Once you have cracks running all over the shell, place the egg into a cup filled with the colored dye of your choice. Place in refrigerator and let soak overnight.
- In the morning, rinse off excess dye and enjoy your “dinosaur” eggs.
Silk Tie Easter Eggs*
Recommended ingredients: Eggs, white cloth napkins, slotted spoon, various silk ties — we recommend purchasing some at the thrift store, as you won’t be able to reuse them after this
- Cut the silk ties into square pieces big enough to wrap around an egg.
- Cut the cloth napkins into a similar size.
- Wrap the silk piece around the egg, with the pattern side facing the eggshell. Then wrap the napkin around the silk piece. Secure in place with a rubber band or twist tie.
- Place covered eggs in a pot and fill with water until the eggs are covered.
- Add 3 tablespoons of white vinegar to the water and then bring to a boil.
- Reduce heat and allow eggs to simmer for 20 minutes.
- Remove eggs from pot and allow to cool completely.
- Remove fabric and enjoy your gorgeous eggs.
Tie-Dyed Easter Eggs*
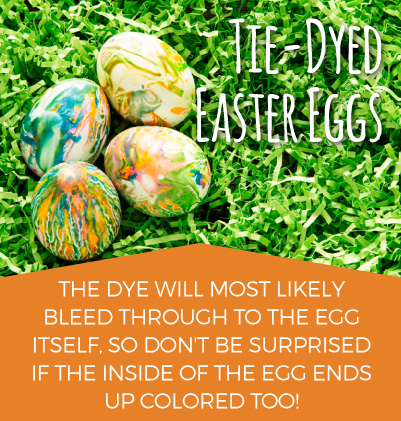
Recommended ingredients: Eggs, various dye colors, coffee filters, spray bottle, water, vinegar, plastic bags, rubber bands/string
- Fill a water bottle with a combination of water and 2 to 3 teaspoons of vinegar. Don’t be stingy on the vinegar. The more you use, the darker your colors will turn out.
- Spread out a coffee filter on a flat surface you don’t mind potentially staining — such as a cutting board, cookie sheet or cardboard — and smooth until flat.
- Add dots of food coloring onto the coffee filter.
- Spray the colored coffee filter with the water/vinegar combination until just barely damp. If it’s too wet, the colors will run before they ever make it to the egg and this won’t work.
- Wrap the coffee filter tightly around the egg, then place a plastic bag around the filter-wrapped egg and use a rubber band or a piece of string to tie them together tightly.
- Place in refrigerator and allow to sit for several hours. The longer it sits, the more brilliant the colors will turn out, so overnight is the best option if you have the patience to wait.
- Unwrap and enjoy!
Note: The dye will most likely bleed through to the egg itself, so don’t be surprised if the inside of the egg ends up colored too.
Speckled Eggs*
Recommended ingredients: Eggs, clear-drying glue, glitter, cooking oil
- Mix a few drops of cooking oil into each of your dye colors before you begin dipping the eggs.
- Start dyeing the eggs. You can switch among several colors to intensify the speckled effect.
- Allow eggs to dry.
- While eggs are drying, mix some neutral-colored glitter with glue.
- Once eggs are dry, paint a thin layer of the glue and glitter mixture onto the eggshell and allow to dry.
Monogrammed Eggs*
Recommended Ingredients: Eggs, letter stickers, various dyes
- Gently place a sticker with the letter(s) of your choice onto your egg. Make sure it is firmly in place.
- Lower egg into the dye and allow to soak to the desired color.
- When the dye is dry, peel off the sticker. You’ll have a bright white monogram on your egg, and no arguments over which child dyed each egg!
Volcano Eggs*
Recommended Ingredients: Eggs, various paints and dyes, vinegar, baking soda, water
- Create a “paint” mixture by combining baking soda, a few drops of egg dye and a few teaspoons of water. Mix together.
- Grab a brush and apply paint all over the egg. This works best if you use several different colors on the same egg.
- Use a dropper to place a few drops of dye onto the painted egg.
- Holding the egg over a bowl or container you don’t mind getting messy, pour vinegar over the egg and allow it to fizzle.
- Repeat steps 2, 3 and 4 as desired to create more patterns and a richer color on your egg.
- Gently wipe off vinegar or allow to air dry.
Fun Ways to Decorate Easter Eggs
Want to create beautiful eggs without the mess of dyes? We’ve got you covered. There are so many different ways to get creative without messy dyes. And we’ve added an asterisk next to the ones that are especially kid-friendly. The other great thing about these methods is that there aren’t nearly as many steps involved, so if you’re looking for quick ways to decorate Easter eggs, we think you’ll find a few ideas here. We also think some of these ideas would be a great way to get your Easter guests involved — set up an egg-decorating station at your Easter celebration and let your guests decorate their own!
- Temporary Tattoos
- Permanent Markers
- Modge Podge
- Glitter
- Ribbons
- Stickers
1. Temporary Tattoos*
You’ve seen your kids with them, but how about putting them on your Easter eggs? Press the tattoo onto the surface of the egg with a damp sponge for up to 30 seconds and allow it to air-dry for just a few minutes.
2. Permanent Markers
Forget about paint altogether and grab a few fine-point permanent markers. Start doodling away, creating scallops, scroll designs and anything else you can imagine. You can go for a modern black-and-white design or throw in some color for a bright tribute to spring.
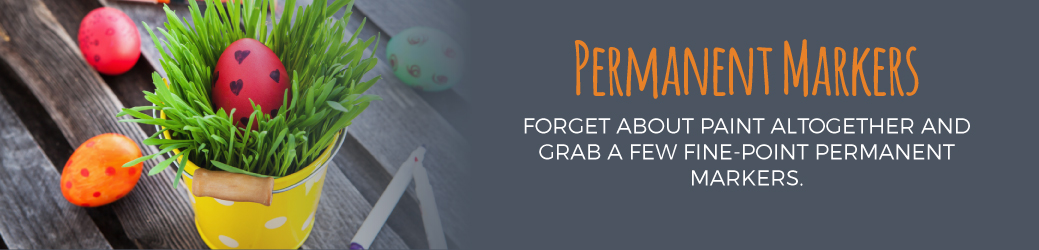
Note: While you can also do this with eggs you’ve colored, the white background of an undyed egg provides an excellent canvas for beautiful, detailed artwork.
3. Modge Podge Eggs*
Recommended ingredients: Eggs, tissue paper, Modge Podge, paintbrush
Cut out various shapes of tissue paper — bigger pieces if you’re doing this with little kids. Brush Modge Podge onto the surface of the egg, press the tissue paper onto the egg and then brush more Modge Podge on top of that. Repeat until you’ve covered the egg and then allow to dry.
If you have kids who are too little to handle the Modge Podge, or you don’t want to deal with the mess, you can do a variation on this called “Tissue Paper Eggs.” Just use scissors or a hole punch to create small shapes and polka dots out of the tissue paper. Then, use a glue stick to glue the cutouts to the surface of the egg.
Note: If you aren’t using Modge Podge, you can also use origami paper instead of tissue paper. We don’t recommend origami paper for children, but it’s great for adults looking for a creative alternative. Once you cut out your shapes and designs, use a small paintbrush to brush glue onto the back of the paper shapes and press gently onto the egg.
4. Glitter*
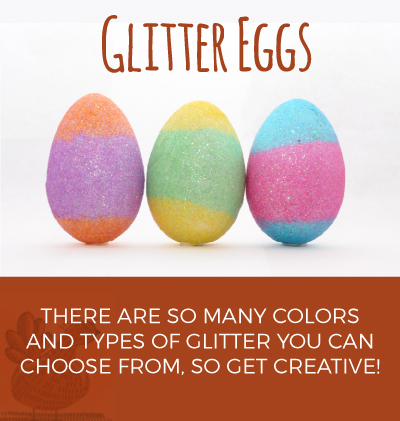
There are so many colors and types of glitter you can choose from, so get creative! Spread a thin layer of glue onto the surface of the egg and roll it in the glitter. You can cover the whole egg or apply the glue in polka dots or other designs. If you really want to get fancy, adding sequins on top of the glitter can add a final embellishment that makes them pop! Or, if you want to add a little sparkle to your traditionally dyed eggs, mix a coordinating shade of glitter with glue and then paint it onto the surface of your dyed egg. The glue will dry clear and leave you with a sparkly, festive egg.
5. Ribbons
Have all those remnants in your scrap fabric bag? They just might go great on your Easter eggs. Cut them out in the right lengths for the egg and use a découpage medium to glue them onto the egg.
6. Stickers*
You’ll want to skip the cheap children’s stickers and opt for 3-D scrapbooking stickers here — something springy like flowers or birds. Press them gently onto the surface of the eggs. They really pop off the eggs and look gorgeous displayed in egg cups.
Non-Traditional Methods for Decorating Eggs
Dyeing eggs is obviously the more “traditional” approach to decorating Easter eggs, but if you’re looking to spice things up this Easter, you just might be looking for fun ways to color your Easter eggs without using dyes. We’ve got you covered with these great ideas for non-traditional methods of decorating Easter eggs. The cool thing about these ideas is that they also work great on wooden craft eggs. That means you can make them gorgeous once and reuse them in years to come.
- Washable Tempera Pain
- Fingernal Polish
- Watercolors
- Sponges
- Lace
- Paint Pens
- Puffy Paint
- Splatter Paint
- Melted Crayon
- Chalkboard Paint
- Baking Soda Paint
- Bakers’ Twine
- Sprinkles
1. Washable Tempera Paint*
Grab a few brushes and some washable tempera paint, and let the whole family get into the fun of decorating eggs. Flat paintbrushes work especially well for this. Make sure you place them upright to dry so you won’t smudge the paint.
2. Fingernail Polish
Grab several of your favorite shades and get to work! The great thing about fingernail polish is that the paint gives your eggs a shine you wouldn’t get with other paint types. We recommend doing two layers to make sure the color is rich and even. After you’ve got a dried base layer in place, you can use other colors to create springtime designs and pictures on the surface of the egg.
3. Watercolors

Traditional watercolors make a great option for painting eggs. Use a rounded brush or even the eraser end of a pencil to create polka dots and various other designs on the surface of the egg. Get creative, have fun and be prepared for breathtakingly beautiful eggs.
4. Sponges*
Cut a larger sponge into strips. Choose one to two paint colors per egg. Dip the sponge in the first color and dab it once or twice onto a scrap piece of paper to wipe off any excess paint. Then, dab your egg in whatever pattern or coverage you want. Repeat this process with a second color, if desired.
5. Lace
Cut a small strip of lace out of a larger piece, then carefully use a paintbrush to coat the lace with acrylic craft paint. Transfer the lace, paint side up, onto a layer of paper towels. Then carefully roll the egg across the piece of lace.
6. Paint Pens
Get creative drawing on shapes, designs such as polka dots and stripes and anything else that will add a little shine to your eggs.
7. Puffy Paint*
The ’90s are back with this decorating idea. Grab springtime colors and get to work using puffy paint to draw designs on your eggs. Make flowers, polka dots and geometric patterns that add color and texture to your eggs.
8. Splatter Paint
Go for an ultra-modern look with this method. Using a paintbrush and black paint, hold the brush over the center of the egg and tap the handle of the paintbrush to make the paint splatter. Lighter taps will make smaller lines and designs. The harder you tap, the bigger the lines. Play around with technique to achieve your desired results.
9. Spray Paint
This particular method of decorating eggs is best with wooden craft eggs instead of hardboiled ones. But, if you insist on being ultra-traditional and using real eggs, we recommend not eating them later. For this project, you’ll want to buy metallic spray paint. Then, head to a well-ventilated area and spray the eggs until they are evenly coated. Allow them to dry. After the spray paint is dry, grab a paint marker or a Bistro Chalk Marker and draw lines, shapes and various designs.
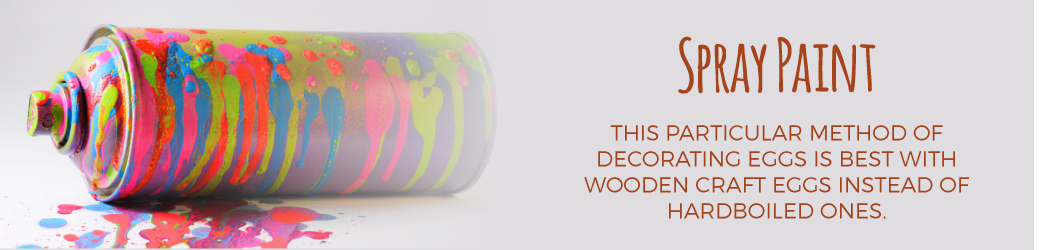
Note: Using a Bistro Chalk Marker is perfect for this project because it is easy to wipe off and reapply if you make a mistake.
10. Melted Crayon*
Take your crayons and carefully shave off small pieces of the wax. Then, with your hot egg resting on a paper towel or paper plate, sprinkle the crayon shavings all over the egg. Allow to melt and then cool.
Note: For this one to work, your eggs must be warm. You can do this as soon as they are done boiling or, if you can’t do it then, reheat the eggs before you try this.
11. Chalkboard Paint*
This process is especially great if you’re using wooden eggs, because you’ll want to hang onto these for next year! Spray or paint eggs with chalkboard paint and allow to dry. Then decorate with colored chalk.
12. Baking Soda Paint*
Recommended ingredients: Eggs, powdered tempera paint, baking soda, vinegar, various small containers, tongs
This one is a little more involved, but the results are well worth the effort. Pour in enough baking soda to cover the bottom of a small container, then add approximately a tablespoon of the powdered tempera paint. Mix these two ingredients together, then place the egg on top of the powder. Pour a small amount of vinegar into the container and watch it react with the baking soda. It will fizzle and bubble up for a little while, then, as it starts to come down, you’ll have a colored egg with gorgeous speckles and imperfections all over it. Allow it to dry.
Note: Powdered tempera paint is not safe to consume, so please be careful if you plan to eat your hardboiled eggs later. If you peel off the shell and see any color has bled through, do not eat the egg.
13. Bakers’ Twine
You’ll want to use plastic Easter eggs for this project. Hot glue the end of the baker’s twine to the tip of your egg. Apply Modge Podge partway down the egg and then begin tightly wrapping the twine around the egg. When you get about two-thirds of the way down the egg — to the point where it starts to taper again — cut the twine, glue the end down, then start again from the other end of the egg, eventually ending when the two sides meet. Adjust as needed to fill in gaps. Repeat with other colors.
14. Sprinkles*
Recommended ingredients: Nonpareils in various pastel or springtime shades, eggs, tacky glue, paintbrush
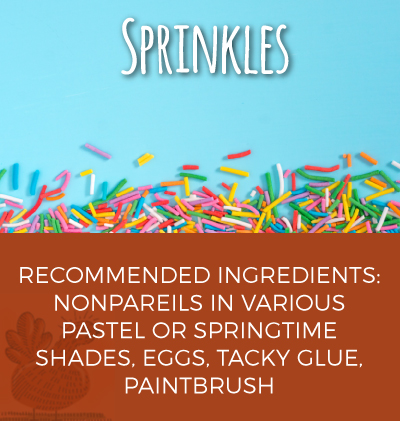
Pour the sprinkles into a bowl big enough to roll an egg around in. Squeeze some tacky glue out onto a paper plate. Next, use the paintbrush to gently brush a layer of glue all over the shell of the egg. Once the shell is covered in glue, roll around in the sprinkles until the egg is covered. Allow to dry completely.
Things to Remember When Dying Eggs
We love all these ideas for making beautiful Easter eggs. But no matter which methods you choose to try, there are a few things to remember.
- Always allow eggs to cool before allowing children to handle them — the exception to this is the Crayon Eggs, which should be handled under careful adult supervision.
- Some of these methods may cause dyes or colors to bleed through the shell and onto the flesh of the hardboiled egg. Know your materials, and avoid eating any eggs you have dyed using non-food items like spray paint or tempera paint powder.
- The best way to dry the eggs — whether you have dyed or painted them — is to place them in an upright position. Doing so will avoid dye or paint running or smudging during the drying process.
- Refrigerate eggs until you’re ready to use them. They are good for up to one week in the refrigerator.
- Have fun! It’s not about who can make the best egg or the most intricate design. Dyeing Easter eggs is about enjoying quality time with people you care about.
What To Do With Eggs After You’ve Dyed Them
Everyone loves the idea of having beautifully decorated hardboiled eggs at Easter. The problem is, what are you going to do with a few dozen hardboiled eggs after your guests have oohed and aahhed over them? If you’re like us, the idea of wasting perfectly good eggs is terrible. So, don’t waste them. Eat them. Check out these delicious ideas for repurposing those beauties.
- Eat them plain as a snack or side dish with a meal.
- Get creative in the kitchen and whip up a delicious egg salad recipe.
- Keep those culinary juices flowing with a batch of deviled eggs.
- Add them to potato salad, pasta salad, green salad … heck, any kind of salad you want!
- Slice them up and add them to a breakfast sandwich, burrito or even a ham-and-cheese quesadilla.
The great thing about eggs is that they’re nutritious and versatile. And you can incorporate them into so many great dishes for breakfast, lunch or dinner.
But, if all else fails and the eggs go bad before you get to them, you still have options. You can host egg races or an egg hunt. Even if you have to throw them away after the fun, at least they served more than one purpose during the Easter season. And, if you opted for some of the ideas that work well with wooden or plastic eggs, you can just pack them away and reuse them next year. How’s that for versatile?
Family Fun With Easter Eggs
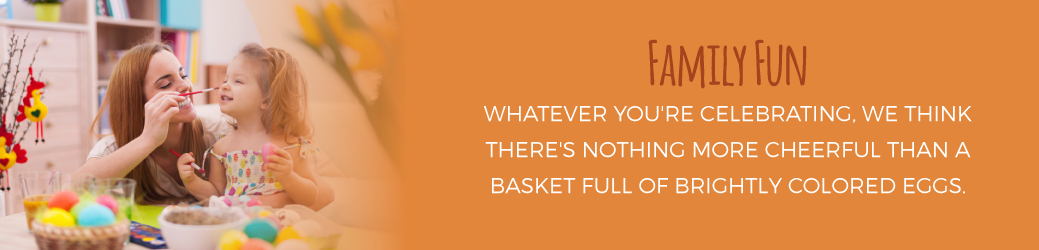
Although widely associated with the Christian celebration of Easter, dyeing hardboiled eggs predates any modern religious practice. In many cultures around the world, eggs are a symbol of new life, fertility and rebirth. Long before eggs were an Easter tradition, they were linked with pagan celebrations of the spring equinox. Whatever you’re celebrating, we think there’s nothing more cheerful than a basket full of brightly colored eggs. And the best part is, it’s simple, inexpensive and fun for people of all ages.
It’s no secret Sauder’s is crazy about eggs. We wouldn’t have dedicated three generations of our family to producing high-quality eggs if we weren’t. What began as a Depression-era door-to-door egg business has become one of the country’s top processors and marketers of fresh eggs. But even as we’ve expanded, we haven’t forgotten what brought us to this point: our family.
The great thing about eggs is you can use them for more than just eating. During this springtime season, eggs provide families the opportunity to gather around their tables and get creative together. Whether you’re making dyes out of fruits and vegetables, painting with watercolors or placing a sticker on your egg, you’re making lifelong memories. And experiences like that that can knit a family together for generations to come.
We hope this extensive list of egg decorating projects will give you plenty to try this holiday season. And we hope you will make many beautiful eggs to grace your Easter table. However you decorate them and however you use them, we’d love for our eggs to be the ones you choose. Visit the “Store Locator” on our website to find out where you can purchase our products. If you want to know more about us, visit our online resource center and make sure to sign up for our email newsletter.